In this tutorial, we will create a logo with an animation effect. To create such a logo, we need Photoshop version CS6.
Resource used:
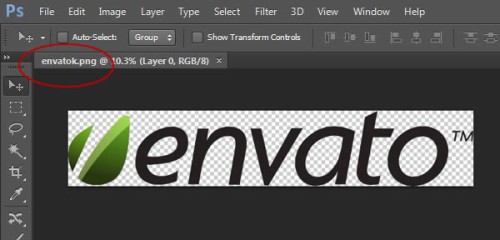
Envato Logo
Open the logo image of your choice in Photoshop, I chose this one. Please note that the background on which the logo is located is transparent – this is an important point in working with 3D. There is no need to reduce the size of the image at this stage, we will do it at the end of the tutorial when we save it as an animation.

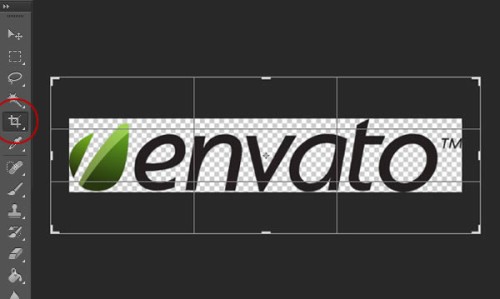
Use the Crop Tool (C) (Frame) and increase the size of the image so that there is more free space on all sides of the inscription. To save changes, press Enter.

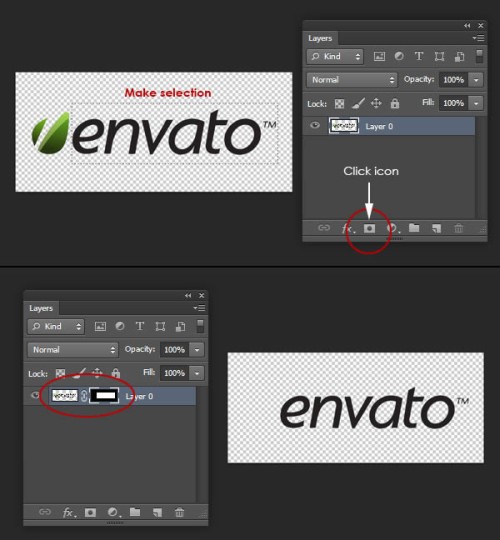
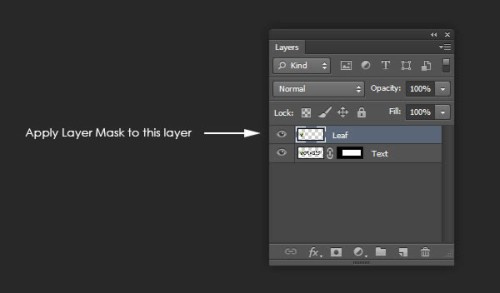
Tool Rectangular Marquee Tool (M) (Rectangular area) select only the envato text. Then add a mask to this layer by clicking on the icon Add layer mask (Add layer mask) at the bottom of the layers panel. As a result, the logo itself will disappear.

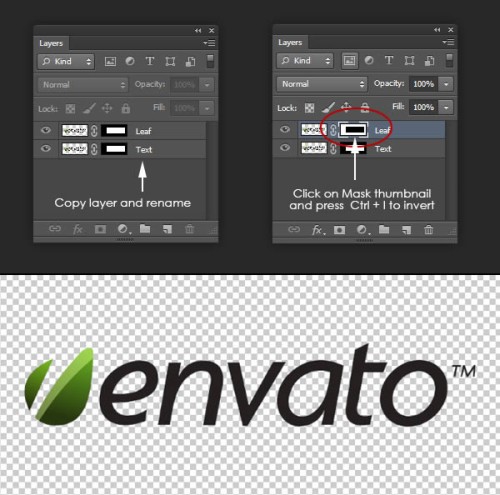
Rename the text layer to Text, duplicate Ctrl + J and name the copy Leaf. Go to the Leaf layer mask and invert the colors with Ctrl + I, as a result, the text and logo will be on different layers.

Select the Leaf layer, go to the menu Layer> Layer Mask> Apply (Layer – Layer Mask – Apply) and apply a mask to the image layer – this will allow us to remove the part of the image hidden under the mask.

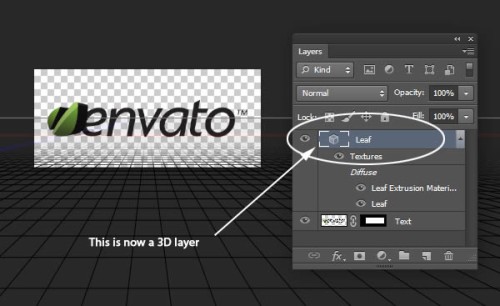
Now go to the menu 3D> New 3D Extrusion From SelecteD Layer (3D – New 3D extrusion from the selected layer). After that, you should have all the 3D panels open. If something didn’t work out for you, then you can open these panels by going to the menu Window> Workspace> 3D (Window – Workspace – 3D). The Leaf layer should now be converted to a 3D object.

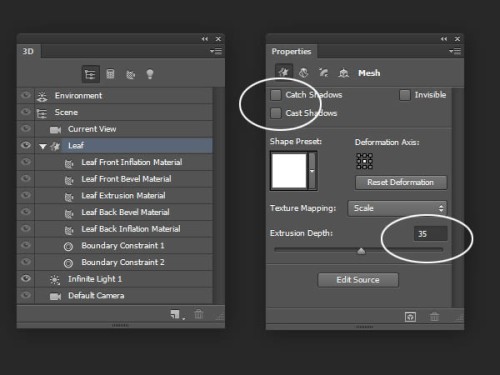
Go to the 3D panel and select the Leaf object, which is indicated by the star icon. Next, go to the Properties panel (Properties), change the value of the parameter Extrusion Depth (Extrusion depth) to 35 and turn off the options Catch Shadows (Shadow capture) and Cast Shadows (Overlay shadows).

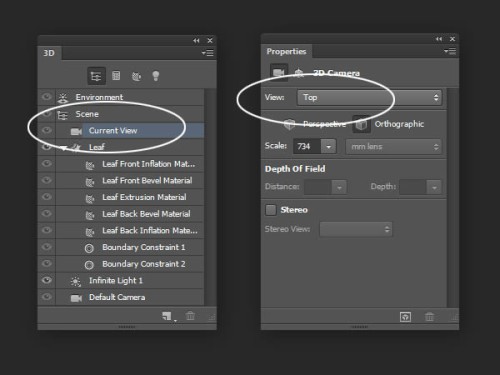
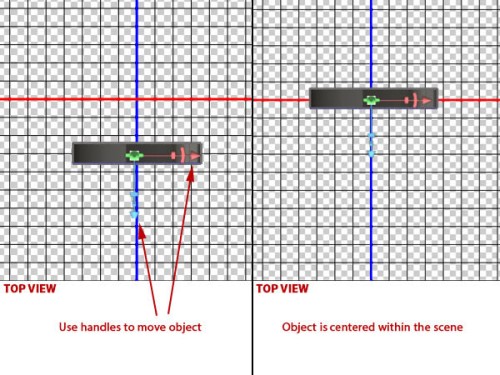
Now we need to move the Leaf object to the center of the document. But first, place the camera correctly. On the 3D panel, select the layer Current View (Current view), and on the panel Properties (Properties) in the parameter View (View) select Top (Top).
Move the Leaf object to the center of the document using the on-screen 3D object controls. The center is indicated by the intersection of the red (X-axis) and blue (Y-axis) lines.
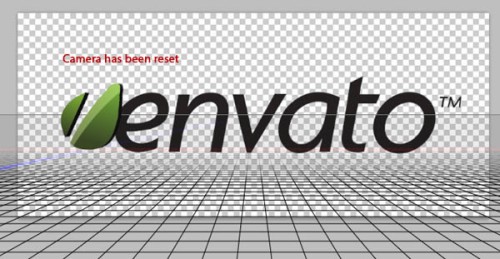
At the moment we see our working canvas on top. In the Properties panel, select Default Camera to return the camera to its original position. Note that the logo itself is in the wrong position. We will fix this now.

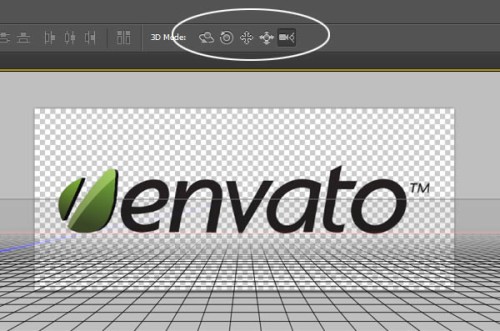
To change the position of the logo, we will use the camera editing tools in the top menu bar, as a result, we can easily return the logo to its original position. Now we need to move the camera itself, not the object as we did before.

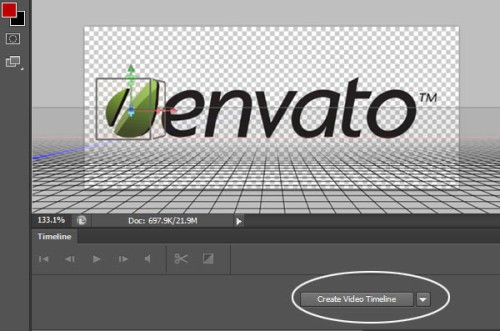
Now we will start animation. Click Create Video Timeline in the Timeline panel. To display this panel, go to the menu Window> Timeline (Window – Timeline).
Please note that all layers are reflected on the timeline as separate video layers. At the moment we have two video layers.
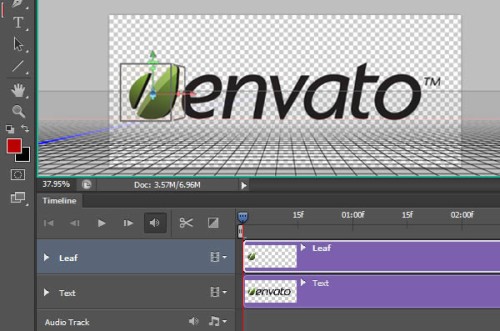
To animate the logo, we need to go to its properties in the timeline. To display all the properties that can be animated, click on the little arrow to the left of the video layer name. At the moment, we are interested in the option 3D Scene Position (Position of the 3D scene).

Click on the stopwatch icon to enable keyframe animation. This will allow us to add our first keyframe to the timeline (indicated by the yellow diamond).
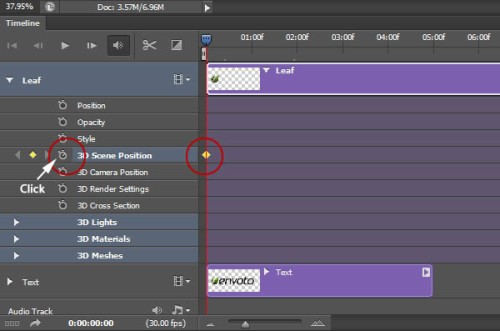
Because the animation keyframe is on, Photoshop will automatically add the keyframe when changes are made to the scene’s position (or rotation). Before moving on to rotating the scene, we need to set the duration of the animation. To do this, you need to move the current time indicator (marked with a blue slider) to another point on the timeline.
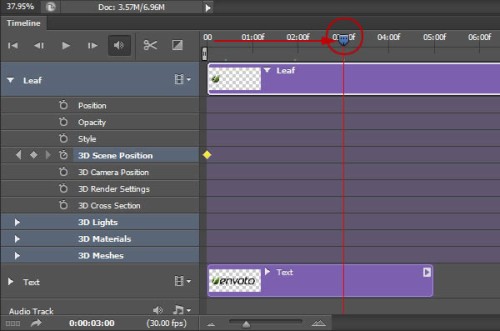
Return to the 3D panel, make the active layer Scene (Scene), and then go to the panel Properties (Properties). Click on the icon Coordinates (Coordinates) and on the Y axis change the angle value to 360 degrees, which will rotate the scene around the Y axis by 360 degrees.

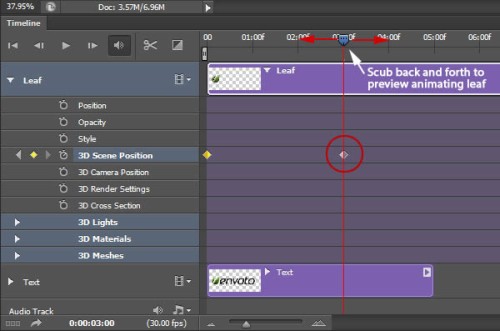
After the done actions on the timeline, a key frame should be added. Using the current time slider (indicated by the blue slider), moving it back and forth, you can see the progress of the animation of the 3D object. Since our logo is in the center, it will rotate in place.
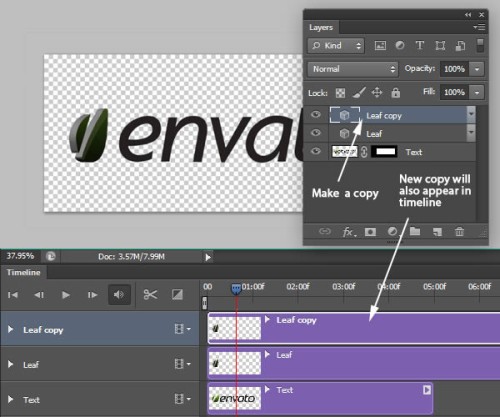
Our task is to make the logo constantly rotate around its axis and show only its front part all the time. To do this, duplicate the Leaf layer in the Layers panel. Note that a duplicate logo layer will appear in the timeline.

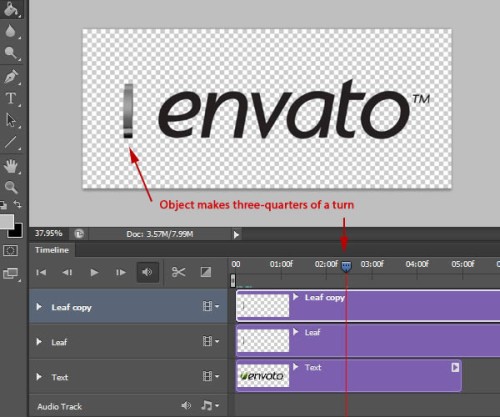
Now move the time indicator to the place where the logo makes three-quarters of a turn around its axis.
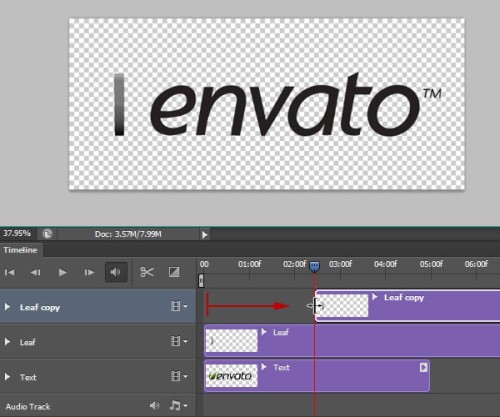
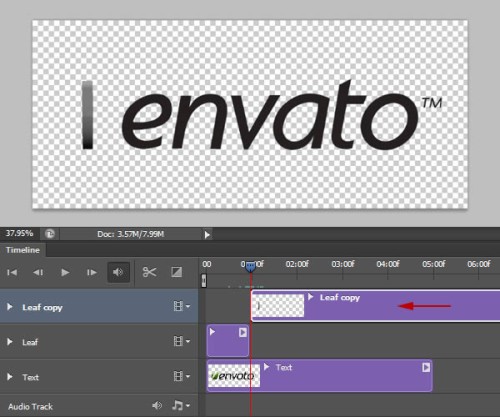
Move the cursor to the beginning of the video layer of the logo copy. After the cursor changes to a square bracket icon with two arrows, move the layer to the red line. This video layer will be cut off, and the animation will start after three-quarter rotation.
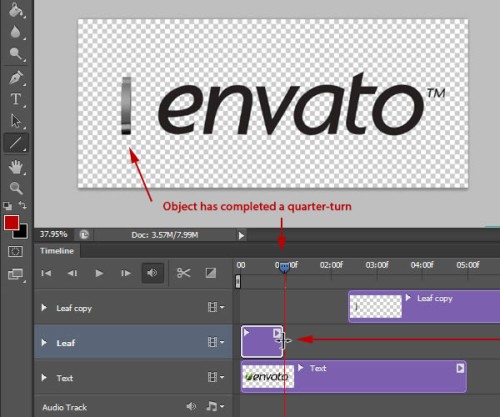
Now let’s clean up the first part of the animation, in which our object makes one quarter turn. To do this, go to the Leaf video layer and move its end to the red line, see the image below.
Finally move the Leaf copy video layer to the red line in the timeline. Make sure this animation is continuous.
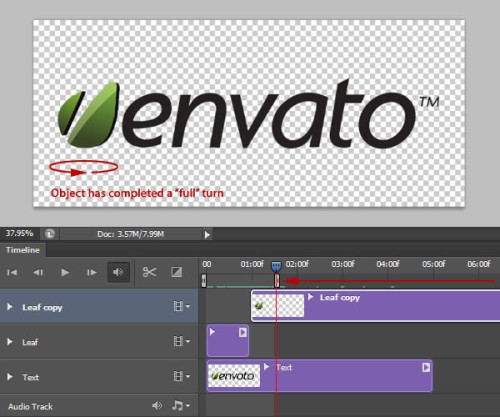
Before we continue creating the animation, we need to tell Photoshop which frames we want to use. By moving the time indicator, determine at what point the logo will complete a full rotation. Now move the slider to the red line under the timeline to the found mark. As a result, only those frames that we specified will be reflected in the animation.
Save Animation
The animation is complete, now we need to save the animated logo as a file using the gif format. Here are two ways. The first is to save the file quickly, but the quality will be poor. The second is that it will take longer to save, but the gif file will be of high quality.
Now let’s look at these methods in more detail. First: go to the menu File> Save for Web (File – Save for web and devices). This save method skips the render period and saves the frames as they appear in the animation. Based on the image below, change the following settings:
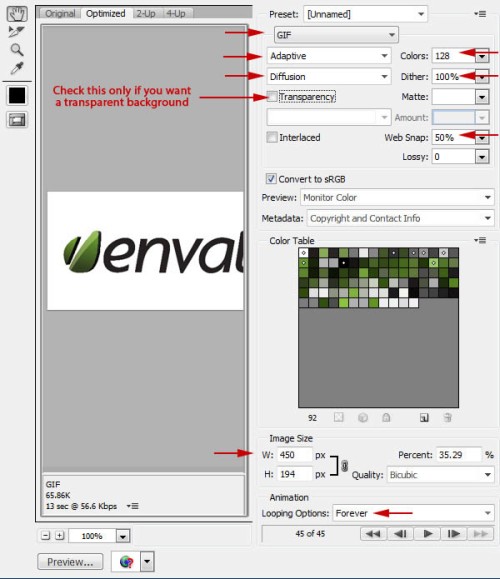

Here is the result of saving using the first method:


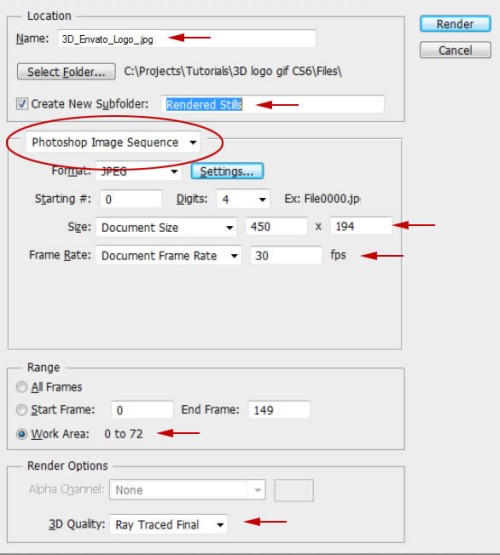
The essence of the second method is to render animation. This is necessary in order to improve the quality when saving the gif file. Go to the menu File> Export> Render Video (File – Export – View Video). Set these options: Photoshop Image Sequence (Photoshop image sequence) and Ray Traced Final (Final ray tracing). Thus, the logo in the form of animation will be saved on separate frames. See the image below for other settings.

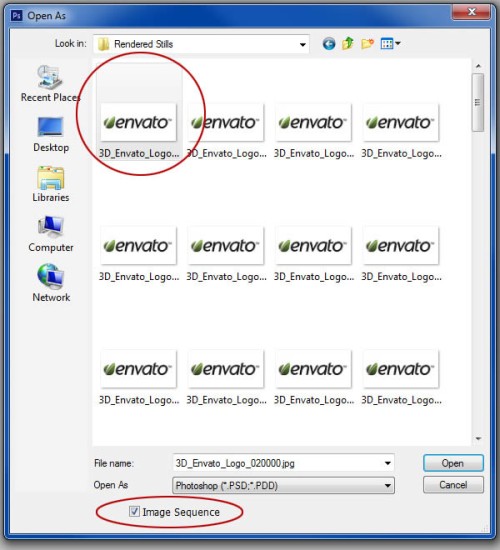
After going through and saving the render, we can open the frames and save them as an animation. To do this, go to the menu File> Open As (File – Open As) and specify the folder in which you saved the frames. Select the first image and activate the Image Sequence option at the bottom of the window. Click the Open button, then a dialog box should appear asking you to click OK.

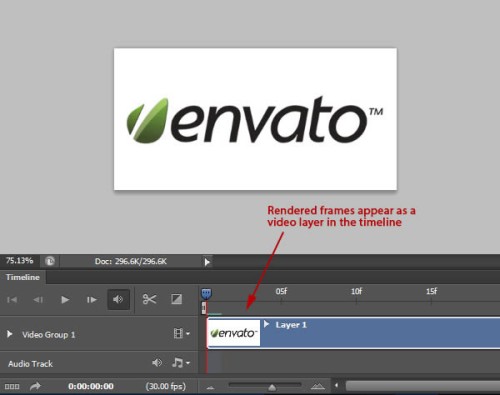
After the done actions, the saved frames will appear on the timeline as a new animation.

To save the animation in gif format, you just need to repeat the steps that we performed earlier.
As a result of simple manipulations, we got a rather stylish animated logo.