


Dried fruit has been enjoyed for thousands of years. Long before refrigeration, people preserved fruits by drying them in the sun. Today, dried fruit remains popular because it is:
Long-lasting
Nutrient-dense
Naturally sweet
Portable
Perfect for snacks and baking
While store-bought options are convenient, homemade dried fruit is healthier because you can avoid:
Added sugars
Artificial preservatives
Sulfites
Extra oils
In this complete guide, you’ll learn everything about making dried fruit at home — from selecting fruit to proper storage.
Table of Contents
What Is Dried Fruit?
Dried fruit is fresh fruit that has had most of its water removed through drying methods such as:
Sun drying
Oven drying
Dehydrator drying
By removing moisture, fruit becomes shelf-stable while concentrating its flavor and natural sugars.
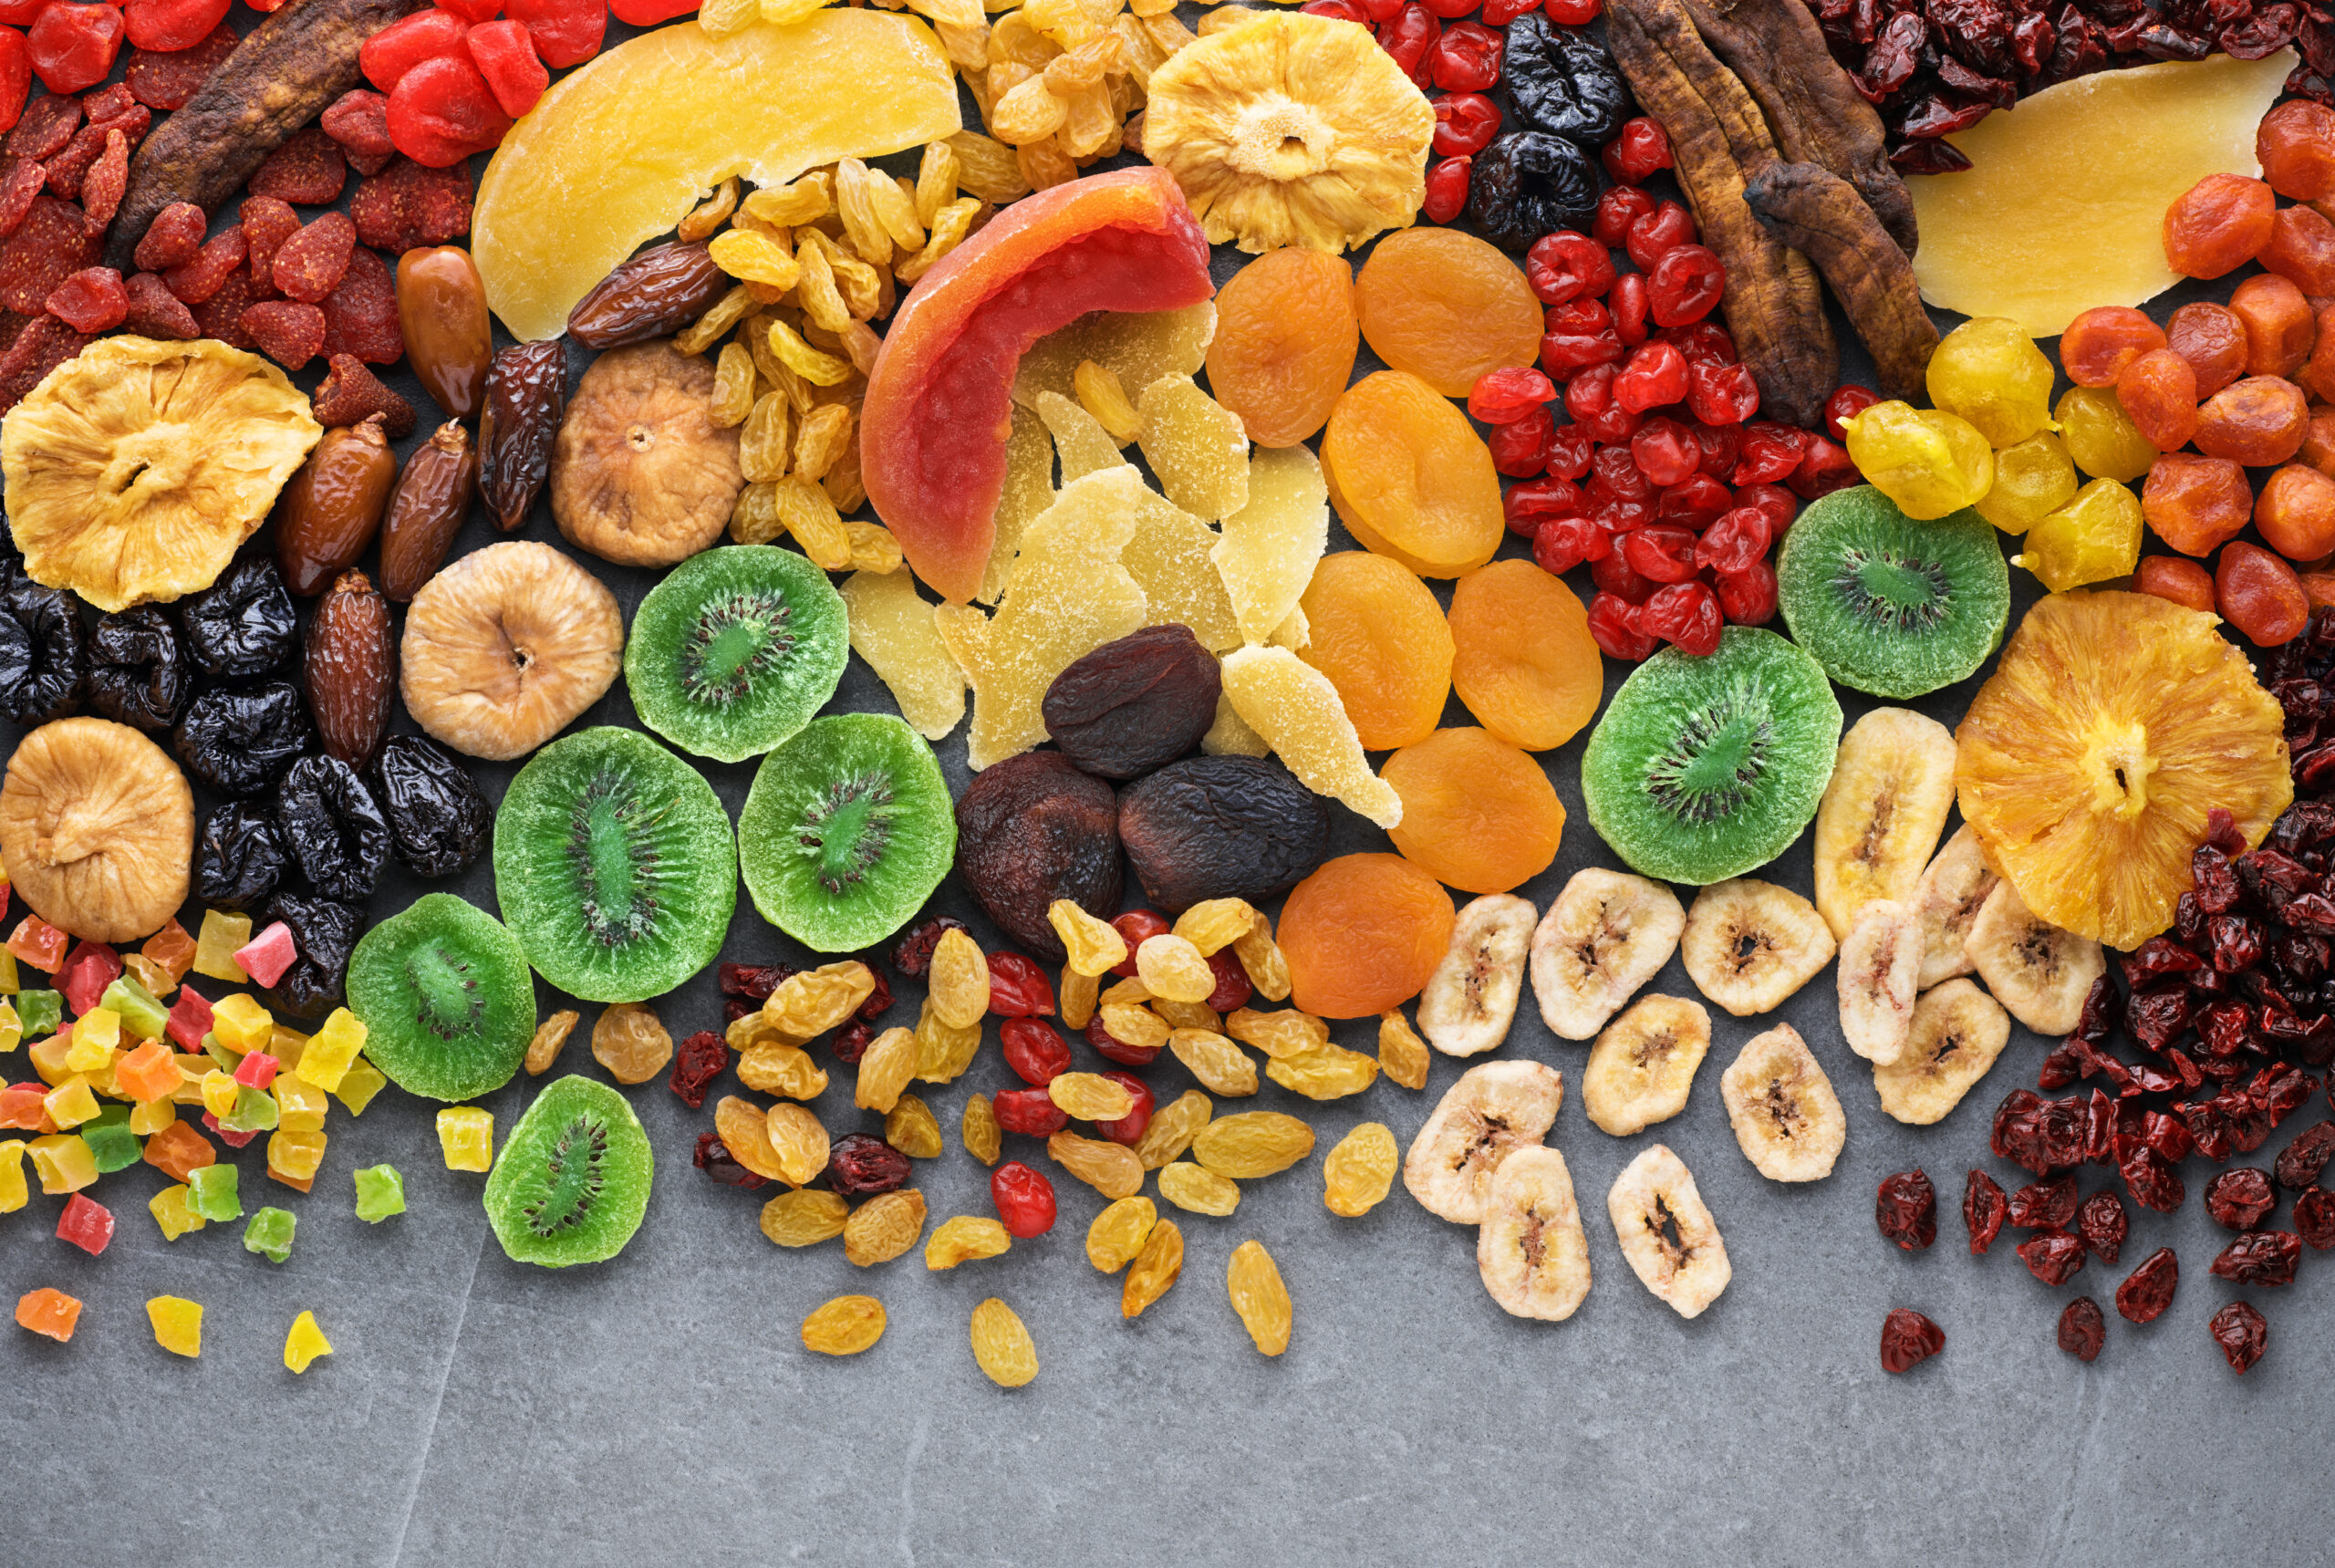
Common dried fruits include:
Raisins (from grapes)
Dried mango
Dried apple slices
Dried apricots
Dried bananas
Benefits of Making Dried Fruit at Home
1. No Preservatives
Commercial dried fruits often contain sulfur dioxide to maintain color. Homemade versions are chemical-free.
2. No Added Sugar
Many packaged fruits contain added syrups. Homemade drying keeps it natural.
3. Budget-Friendly
When fruit is in season, drying helps prevent waste.
4. Customization
You control:
Thickness
Sweetness
Texture
Organic quality
Best Fruits for Drying
Almost any fruit can be dried, but some work better than others.
Excellent for Drying:
Apples
Mangoes
Pineapple
Strawberries
Blueberries
Peaches
Pears
Bananas
Figs
Grapes
Choosing the Right Fruit
The best fruit for drying is:
Ripe (not overripe)
Firm
Free from bruises
Freshly harvested
Overripe fruit becomes too soft and sticky when dried.
Preparation Before Drying
Proper preparation ensures better texture and color.
Step 1: Wash Thoroughly
Remove dirt, pesticides, and debris.
Step 2: Peel (Optional)
Peeling depends on preference. Apples and pears can be dried with skin.
Step 3: Slice Evenly
Uniform slices ensure even drying.
Recommended thickness:
¼ inch (6 mm)
Too thick = takes longer
Too thin = overly crisp
Preventing Browning
Some fruits oxidize and turn brown.
To prevent browning:
Lemon Water Soak
Mix:
1 tablespoon lemon juice
1 cup water
Soak fruit slices for 5 minutes.
Ascorbic Acid
Vitamin C powder can also be used.
Method 1: Sun Drying Fruit
Sun drying is the oldest method and works best in hot, dry climates.
Ideal Conditions:
Temperature above 30°C (86°F)
Low humidity
Strong sunlight
Good airflow
This method is common in warm regions, including parts of India and South Africa.
Steps for Sun Drying
Place fruit slices on drying trays
Cover with thin mesh cloth
Place in direct sunlight
Bring inside at night
Dry for 2–4 days
Rotate pieces daily.
Pros:
- No electricity
- Traditional method
Cons:
- Weather dependent
- Risk of insects
- Slower process
Method 2: Oven Drying
Oven drying works in any climate.
Temperature:
50–70°C (120–160°F)
Steps:
Preheat oven to lowest temperature
Line tray with parchment paper
Arrange fruit in single layer
Leave oven door slightly open
Dry for 4–10 hours
Turn slices every 2 hours.
Advantages:
- Reliable
- Faster than sun drying
Disadvantages:
- Uses electricity
- Can over-dry if not monitored
Method 3: Using a Dehydrator
A dehydrator provides the best results.
Why Use a Dehydrator?
Consistent airflow
Even drying
Temperature control
Steps:
Arrange fruit on trays
Set temperature to 55–60°C
Dry 6–12 hours
Check periodically.
How to Know When Fruit Is Properly Dried
Properly dried fruit should:
Be pliable
Not sticky
Not moist inside
Not brittle (unless chips)
If you squeeze and moisture appears, it needs more drying.
Conditioning Dried Fruit
After drying:
Place fruit in airtight container
Shake daily for 7 days
If condensation appears, return to dryer.
This step ensures moisture distribution.
Storage Guidelines
Room Temperature
Store in airtight container in cool, dark place.
Shelf life: 6–12 months
Refrigeration
Extends life to 1 year.
Freezing
Can last up to 2 years.
Avoid exposure to moisture.
Popular Dried Fruit Recipes
1. Dried Apple Chips
Slice apples thinly
Sprinkle cinnamon
Dry until crisp
2. Dried Mango Strips
Slice mango into long strips
Dry until chewy
3. Raisins
Wash grapes
Dry whole
Takes 2–3 days in sun
Nutritional Benefits of Dried Fruit
Dried fruit contains:
Fiber
Potassium
Iron
Antioxidants
However, it is calorie-dense due to water removal.
Common Mistakes to Avoid
- Using overripe fruit
- Cutting uneven slices
- Overcrowding trays
- Drying at high temperatures
- Skipping conditioning
Can You Add Flavor to Dried Fruit?
Yes!
Try:
Nutmeg
Chili powder
Honey glaze
Vanilla extract
Is Dried Fruit Healthy?
Yes, when consumed in moderation.
Benefits:
Energy boost
Digestive support
Rich in micronutrients
But portion control is important due to natural sugar concentration.
Can You Make Dried Fruit Without Sugar?
Absolutely. Fruit contains natural sugars and does not need added sweeteners.
Using Dried Fruit in Recipes
Dried fruit can be added to:
Oatmeal
Granola
Smoothies
Cookies
Trail mix
Salads
Advanced Drying Tips
Blanching
Some fruits like blueberries benefit from quick blanching to crack skins.
Sulfuring
Commercial method to maintain bright color (not necessary at home).
Vacuum Sealing
Extends shelf life significantly.
Dried Fruit for Business
Homemade dried fruit can be:
Packaged for local sale
Sold at farmers’ markets
Included in gift baskets
Ensure food safety compliance in your area.
Conculsion
Making dried fruit at home is:
Simple
Healthy
Cost-effective
Customizable
Long-lasting
Whether you use sunlight, an oven, or a dehydrator, the process is rewarding and practical. Once you try homemade dried fruit, you’ll appreciate the fresh flavor and natural sweetness compared to store-bought versions.
Frequently Asked Questions (FAQs)
1. How long does it take to dry fruit?
Sun: 2–4 days
Oven: 4–10 hours
Dehydrator: 6–12 hours
2. Can I dry frozen fruit?
Yes, but thaw first and pat dry.
3. Why is my dried fruit sticky?
It may not be fully dried.
4. Can dried fruit spoil?
Yes, if exposed to moisture.
5. Is homemade dried fruit better than store-bought?
Usually yes, because it contains no additives.
6. Can I dry fruit without special equipment?
Yes, oven or sunlight works.
7. Should dried fruit be refrigerated?
Optional but extends shelf life.
8. Why did my fruit turn brown?
Oxidation. Use lemon soak.
9. Can I dry citrus fruits?
Yes. Thin slices dry well.
10. What is the best fruit for beginners?
Apples and bananas are easiest.