


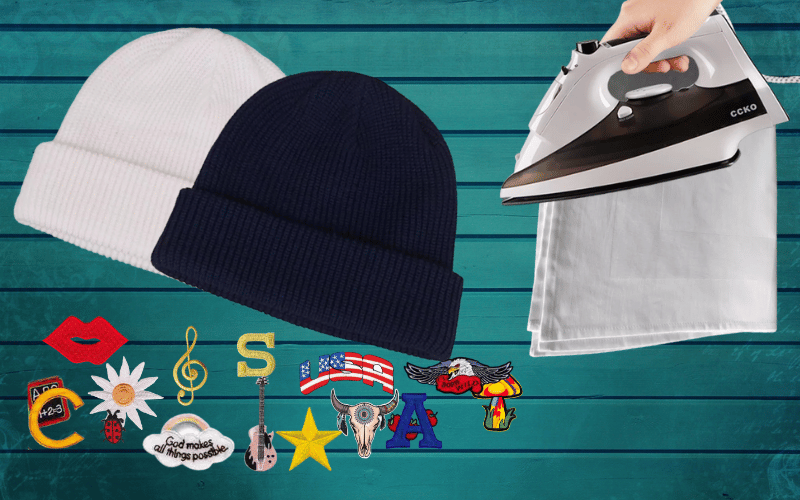
Maybe applying an iron-on patch to a hat is throwing you off as you fear running the attractive emblem. Or are you the one to whom the ironing task drives up the wall? Enough of the situations. Perhaps the straightforward reason for your landing here is to gather info on putting the iron on the patch. Particularly, to an even surface such as a hat. Well, you are directed at the right spot.
It is foolish to argue that patches are going away anywhere. People have taken a liking to them. Especially because of their flamboyant, eye-catching, and dazzling nature. No matter the adults or children, everyone prefers them. Mostly, cause they look cute and funny or otherwise to show power, determination, or strength. However, there are a bunch of ways of sticking these on whichever wearable you desire. But this guide specifically caters to iron-on ones. Therefore, let’s start weaving right now.
Table of Contents
The Nine Super Easy Steps on Applying an Iron-On Patch to a Hat
Step 1: Prepare the Hat
There could be multiple reasons why you wanna patch your hat. Maybe you wanna add some life to your old and pale one. The second reason can be that you aim to implement some creativity in your plain one. Thirdly, the one that caught your attention over a dummy’s head was much more expensive than your pockets couldn’t allow. Whichever is the case, make sure that your hat must be dry and washed properly.
The area onto which you aim to apply the emblem must be free from creases as well. The smoother the part, the better you will be able to place it. Although there are many types of patch backing iron-on ones such as plastic backing, hot seal ones et cetera. You should put your hat somewhere directly in front of you. Make sure you are at a level so that you can apply the insignia with balanced force.
Step 2: Set the Iron
You must be super excited to stick your custom patches to your dull and dreary hat. They surely possess attractive hues and details and basically, this is what we feel so thrilled about.
However, sometimes our irons turn out to be nasty and they got covered with black material over the years. This gross substance effortlessly pasted to our garments whenever we heat our irons and run them over.
Therefore, as a precaution that you don’t end up spoiling your expensive clothing, it is recommended to scrap that out first.
You can do so by taking a soft cloth and warm water. Unplug your gadget and clear out the filthy area of the soleplate.
After this, preheat your iron to 350 degrees Fahrenheit or until it gets warmer. This setting of your iron also depends upon the type of fabric. For instance, it is not a problem if the iron gets a little over-hot, in the case of denim.
Step 3: Ready the Target Area
Now you need to select the desired location on the hat where you aim to neatly place your emblem. Make sure that you choose it decisively. Otherwise removing it and then replacing it in other areas gives your cap an untidy look. Also, the patch sometimes sticks so perfectly that scrapping it off usually results in decoloring of that part.
Another tip is that before finally heat pressing your symbol, iron that part of the cap. This will smooth it out and prepare that area so that it will get stuck hassle-freely.
Step 4: Correct Placement
It is time to carefully put the patch on the heated area. Once you have done that, get comfortable in a position where you can apply even pressure.
Step 5: Carry Out the Heat-Press Process
Are you excited to see how your long-awaited custom iron on patches will look? Well, this is the real procedure, the better you do it, the greater the appearance it will have. Okay! So let’s get started.
Do you have a washcloth at home or a tea towel or maybe any kind of fabric that goes easy with ironing? If yes, then simply grab it and cover the top of your patch with it. It is necessary because sometimes the fascinating emblems and insignia are uniquely designed and made up of delicate shiny material. So, you can think about what will happen if you will expose them to 350 degrees of heat. All glitter and glamour will vanish or in other words, it will simply burn your emblem. Now move your iron over the washcloth in a slow circular motion for about more than a minute and a half. But don’t exceed 2 minutes.
Step 6: Carefully Check
It’s time to see whether you have done a good job or not! Therefore, lift or remove the top covering, that is, tea towel or washcloth, and make sure is this how you wanted it to be. Now there can be two possible outcomes which are as follows:
- If your emblem is nicely and correctly placed
In this case, you simply need to proceed with the next step.
- If your emblem is not correctly placed
Unluckily, if you have put it wrongly or the location of it is not satisfying you: then you need to start with a new one.
Checking ensures that you have achieved your purpose or not. Therefore, this is a mandatory and of course an obvious step. It can also be the reason that the patch is not sticking to that particular type of garment properly. Well, in that case, either give up the idea of applying an emblem on it. Or you can also simply contact the custom patch maker. He will assist you regarding this.
Step 7: Inside Outing
Another step for ensuring powerful attachment is once you have applied the patch correctly. Well, now turn the material inside out and place the washcloth or any suitable fabric over the patched area. Again place the iron for about half a minute. You need to keep your pace slow and carry out the ironing process in a circular motion.
Step 8: Let it Cool
It’s zlmost done. After the heating session, it’s time to give a bit of relaxation to our fabrics. Therefore, keep your hat away so that it cools down. Afterward, you can swing your cap through the air or jolt it with movements. It will enable you to be sure whether it can withstand the forces or will fall away anytime sooner.
Step 9: Pat Yourself on the Back
Well, this is also regarded as step as appreciation should be obligatory.
So finally, you have accomplished the task rather painlessly and with proper safety without burning your hands. Attaching emblems or insignia to a precise place appears daunting and confusing. Especially with surfaces that are not that flat. However, you have followed the proper instructions and now you can flaunt your impeccably-placed-patched hat!
Conclusion:
The love and respect for patches have been in sight since the previous century. People these days use them for a variety of reasons. Enthusiasts apply them to show love, support, and dedication toward their interests. While some glue depicts patriotism and pride. Moreover, youngsters utilize them to radiate coolness and high-spiritedness. They are well-regarded as a fashion statement.
Most people don’t know which fabric glue they should use. Also, many are unaware of proper sewing techniques. These limitations pave way for iron-on patches since almost everyone has irons. Therefore, either for adornment or repair of your apparel or promoting your business, the iron-on SEO Dubai emblem is the best option. Conclusively, follow the earlier mentioned guidelines and decorate your favorite hat with a perfectly neat and strong patch, hassle-freely.